Greetings All!!
I've seen alot of mods out on the 'net for the D104 but I wanted more than just caps and resistors. The MPF102 mods work good but giving exact resistor values doesn't let the amp perform at it's best as a matter of fact I've personally experienced distortion using schematics off the 'net and was more than disappointed with the downright dismal results.
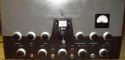
Link to Example Pic's
http://www.twds.site90.net/d104mod.html
The mic mod here is really easy and has fantastic results. It will make any lollypop more fun to use.
Parts Needed
Q1 - MPF 102 (Get a few of them if you can)
C4 - 220uf Electrolytic Cap *any value around 220uF is good
C1 - 470uF - 1000uF Electrolytic - A low ESR cap would be good here but a standard one works too.
C3 - .1 Cap - I used a WIMA poly cap but there is already a .1 ceramic cap on the OEM PCB - you can save this and reuse it. (Ceramic's don't sound that good to me)
R1 10M 1/4 watt
R3 560 1/4 watt - Get a few values more such as 470 down to 200 - Can also be a 2k pot wired as a variable resistor
R2 - 2k pot - Wired as a variable resistor
Some Jumpers
D104
DVM
Small Breadboard - Test Jig
Steps Overview:
Open bottom cover and remove the two screws than fasten the terminal strip and audio preamp board
Extract the PCB - I simply cut the wires.
Remove all parts from the board
De-solider until all holes are visible
Make two trace cuts on the PCB trace side
Tweak MPF102 Drain and Source Values with Test Jig
Populate PCB with new circuit
Re-install and use original wires to PCB
Re-install terminal block
Clean Up Solider and make it look OEM
Final Checks
Replace bottom cover
Keydown with new audio
How to get MAX performance from the MPF102
The secret to the MPF102 is configuring the supporting circuitry to bias the FET in class "A" and provide maximum headroom.
Because of manufacturing differences not all MPF102 are the same. Each FET must be "classified" by the ratio of the Vs to Vd (Voltage at the Source = Vs / Voltage at the Drain = Vd). To put it another way, there are good sounding ones and bad sounding ones. It is possible to predict which ones fall in to either category before everything is together. It is also possible to set the bias point to get maximum clarity, power output and bass response based on the scale provided below which provides optimum performance. Although there are many MPF102 modifications on the 'net the one's I have seen don't usually include the tweaking info. Which is , to me, is like dropping off a smoker with a carton of smokes on a deserted island with no lighter.
The test jig - Breadboard
The test jig is rather simple and kinda to play with fun at the same time. Every time I use it, I get a warm fuzzy feeling knowing that my preamp will come out at it's best. Install the MPF102 in the test socket. On the gate leg - connect the 10mOhm resistor to ground. On the Source leg- connect the 560 Ohm resistor to ground.
Configure the 2k Ohm pot to be a variable resistor by attaching the wiper terminal to either side of the pot
Back to the FET - Connect one side of the variable resistor to B+ and the other to the Drain leg - See Image (MAKE SURE THAT YOU HAVE AT LEAST 500 OHMS DIALED IN ON EACH VR BEFORE ATTACHING TO THE FET AND B+ OR BYE BYE FET!!!!) If you read the Drain voltage at the Source measuring point the FET is cooked.
Measure with a DVM the voltage from the Source Leg to Ground and write that down (or remember that number) *If Vs is more than 2.0 volts A) Check your wiring B) Check the value of the Source Resistor C) Boot that 102 and test another one D)Read on
Now measure from the Drain Leg to ground and record that number.
In this step it is necessary to adjust Vd via the Variable Resistor to obtain the Class "A" point which produces the best sound quality with this circuit.
The "Magic Numbers" - Actually there not magic at all - The Ideal Drain Voltage Formula for this circuit with a 9v battery is ((Vcc / 2))+ (0.5 * Vs)) - Example - I read 1 volt Vs what is the best Vd voltage with a 9 volt battery ((9 / 2)+(0.5*1))=4.5+(.5) = 5.0 volts .
Hate Math? Here's the Scale. The first number is what the Vs voltage reads from the Source Leg and ground and the Second number is what the voltage on the Drain should be adjusted to, both voltages are referenced to ground.
1v - 5v, 1.1 - 5.05, 1.2 - 5.10, 1.3 - 5.15, 1.4 - 5.20, 1.5 - 5.25, 1.6 - 5.30, 1.7 - 5.35, 1.8 - 5.40, 1.9 - 5.45, 2.0 - 5.50
After you measure Vs, measure Vd and adjust the variable resistor so Vd matches with the right Vs as noted above. Example - Vs reads 1.3 volts adjust Vd for 5.15 volts.
If you go with any of the above numbers you will make a good sounding amp for sure and you don't have to do the last step unless you want cherry on the pie.
But I always strive for perfection so....
A last Tweak for Perfection - Lowering Vs
This amp runs at it's best with Vs of 1.0 and Vd of 5.00 using a 9 volt supply. Many 102's will be in the 1.7 to 1.9 range with 560 Ohms which will sound fine with the correct Vd but why not get the MAX performance out of the FET. To get a lower Vs simply lower the Vs resistor but don't use less than a couple hundred ohms and go down in small increments. You can use a variable resistor in place of the resistor for superior accuracy. Now you can adjust both the Source and Drain voltage. With 200 Ohms on the Source the Drain will be around 650 (these are my results and your results will probably be different) ohms, the Jfet is able to run up 20mA but audio people generally say no more than 15mA, Quick math V=I*R (9/(200+650))=.0105 or ~10mA. So keep that in mind as the resistance is lowered.
You can get perfection with the right FET and Source Resistor - I've included a pic that shows a Vs of 1.00 Volts- Sweet!!! Vd is adjusted for exactly 5 volts.
The reality is if you get with in 10% it will be good
Now simply re-populate the pcb using the schematic and use the resistor and pot (or measure the value of the pot and use a resistor closest to the resistance measured) I've included some pix of how I was able to make it all fit but that is just an example of one way. I can say, though, it works pretty good and I like the stock look - a “sleeper”.
Why does this all mater:
By doing all this - You are making sure the amp is running right in the middle with maximum headroom for the positive peaks of your voice and well as the negative peaks. From that statement I'm sure you can deduce if the bias is set to low or high, either the top's of the positive peaks or the bottom of the negative peaks will be cut off which in turn means you have to reduce gain and that means reduced performance everywhere.
You will notice a vast improvement in the bottom end of the D104. It truly is an amazing transformation. For even more improvement try plugging the output of the mic directly in to your PC and run some audio processing software. Ubuntu Studio has Jamin' audio processing that is already included as well as Jack and it's just my kinda price....free. The mic has enough push to drive the sound card to usable level.
Final Checks - Be sure that the ground connection to the preamp is on the switched ground in the mic base or else the amp will stay on while unkeyed and drain the crap out of the battery in like 2 days. Simply measure Vs, it should be 0 volts when the mic is unkeyed.
Check the Drain Voltage one last time before replacing the bottom cover.
I hope this all make's sense. If your interested in building this and want more info just send me a PM and Ill help you get it going.
Also keep in mind that if you build another unit that it will be required to go through the Vs and Vd tweaking process as these numbers are for each individual FET.
I did try mocking up some mpf102 amps using resistor values off the net and I can say that many designs are hopelessly flawed with out the tweak(s). Some were just plain nasty. But I'm happy to say that this modification provides consistent satisfying results.
I hope that others will have just as an enjoyable experience modding a D104 and using it as I have.
73's and Happy Modding
D104 TUG8 Class A Preamp Mod
-
lydianmode
- 4 PILL USER

- Posts: 49
- Joined: November 15th, 2014, 5:55 pm
- Antenna: Full Wave Loop
-
halfwatt959

- Skipshooter

- Posts: 336
- Joined: February 3rd, 2014, 4:06 pm
- Real Name: karl hammons sr
- Antenna: maco base/ whip mobi
- Radio: too many to list
Re: D104 TUG8 Class A Preamp Mod
Thanks for the cool info. Cant wait to try this on one of my d104s. Wont do it on my silver eagle but I have 3 more normal tug-8s to try it on. Thanks again. 73s
2 and 3/4 DX RADIO CHAOS. Halfwatt959 " I MAY NOT CAN FIX IT BUT I CAN TAKE IT APART"
I HATE COMPUTERS!!!!!
I HATE COMPUTERS!!!!!
-
Rabbit Ears

- Donor

- Posts: 557
- Joined: March 14th, 2008, 6:08 am
- Handle: Rabbit Ears
- Real Name: Cliff
- Call Sign: WW153
- Antenna: Hygain Penetrator 500
- Radio: RCI 2995DX CF
- Contact:
Re: D104 TUG8 Class A Preamp Mod
I LOVE YOUR WORK!!! I just could NOT stop until I finished!! Now that I'm done setting it up on the proto board here is what I found:
Works okay.... Tried it, works fair if you wasn't to retrofit your old UG-8 or UG-9.
I DO LIKE the stock preamp because of the easy to get parts for it.
This is what I did with mine..... I bought the HI-FI electret mic element (powered by the mic), and recapped and replaced all off-value components on the original preamp board.
For the capacitors, I used Orange Drops and new electrolytic caps. For the resistors I used 5% metal film resistors. For the 2SC945 transistors, I just tossed them and replaced them both with the same device.
Mine works excellent for a 40+ year old microphone.
Works okay....
I DO LIKE the stock preamp because of the easy to get parts for it.
This is what I did with mine..... I bought the HI-FI electret mic element (powered by the mic), and recapped and replaced all off-value components on the original preamp board.
For the capacitors, I used Orange Drops and new electrolytic caps. For the resistors I used 5% metal film resistors. For the 2SC945 transistors, I just tossed them and replaced them both with the same device.
Mine works excellent for a 40+ year old microphone.
USA FOREVER
RCI 2995DX CF (PRIMARY BASE)
President HR2600 with Palomar TX-150 amp(backup base) *solar powered*
Turner Super Side Kick
RM Italy KL300P (A/B modded) in truck
BIRD 43P
HY-GAIN SPT-500 antenna
RCI 2995DX CF (PRIMARY BASE)
President HR2600 with Palomar TX-150 amp(backup base) *solar powered*
Turner Super Side Kick
RM Italy KL300P (A/B modded) in truck
BIRD 43P
HY-GAIN SPT-500 antenna
-
MDYoungblood

- Site Admin

- Posts: 10,740
- Joined: June 12th, 2010, 8:05 pm
- Handle: MDYoungblood
- Real Name: Gregory
- Antenna: HyGain AV-6160
- Radio: Icom IC-746 (non pro)
- Contact:
Re: D104 TUG8 Class A Preamp Mod
This is interesting and might give it a try. Looking at the pic (the parts pic) from the link I don't see the original D104 mic element. Changing to a electret mic element in itself will change the sound of the microphone as RE has done, I've done several the same way.
3's
Greg
3's
Greg
"321, West Manchester Township, PA"
Official Moderator - CBRT Complaint Department
-
Rabbit Ears
- Donor
- Posts: 557
- Joined: March 14th, 2008, 6:08 am
- Handle: Rabbit Ears
- Real Name: Cliff
- Call Sign: WW153
- Antenna: Hygain Penetrator 500
- Radio: RCI 2995DX CF
- Contact:
Re: D104 TUG8 Class A Preamp Mod
IT WORKS!!
Here is a link for the mic element: **Non Sponsor**
P.S. Redoing your preamp board makes a BIG difference too!! *I had a spare (stock board) to compare the the one I overhauled with* (smoother audio). Before reassembly, please clean your contacts with 1200-1600 grit wet or dry sandpaper (clean with Deoxit).
Since then, I left my *retrofitted* D-104 alone, and use it daily as my anchor mic.
Some advice between buddies.....
(edited by MDY, removed **Non Sponsor** link)
USA FOREVER
RCI 2995DX CF (PRIMARY BASE)
President HR2600 with Palomar TX-150 amp(backup base) *solar powered*
Turner Super Side Kick
RM Italy KL300P (A/B modded) in truck
BIRD 43P
HY-GAIN SPT-500 antenna
RCI 2995DX CF (PRIMARY BASE)
President HR2600 with Palomar TX-150 amp(backup base) *solar powered*
Turner Super Side Kick
RM Italy KL300P (A/B modded) in truck
BIRD 43P
HY-GAIN SPT-500 antenna
-
lydianmode
- 4 PILL USER
- Posts: 49
- Joined: November 15th, 2014, 5:55 pm
- Antenna: Full Wave Loop
Re: D104 TUG8 Class A Preamp Mod
Fantastic!! So glad you were able to build that. And I'm glad you were able to hear the difference. I got a request for an audio phase reversal switch so I'll be putting that up this weekend.
73's and
Happy Modding
-- Saturday, 24 October 2015, 8:35 AM --
Sorry for the double post (Is there a way to edit an existing post?)
As far as the mic element, I'm using the MC320 but I know it works with almost any type of microphone element. I used to not like the sound of a condenser mic but they seem to be much better now than even 10 years ago.
I think the element is a personal preference based upon the tonality of one's voice.
73's and Happy Modding
-- Saturday, 24 October 2015, 8:36 AM --
Sorry for the double post (Is there a way to edit an existing post?)
As far as the mic element, I'm using the MC320 but I know it works with almost any type of microphone element. I used to not like the sound of a condenser mic but they seem to be much better now than even 10 years ago.
I think the element is a personal preference based upon the tonality of one's voice.
73's and Happy Modding
-
Rabbit Ears
- Donor
- Posts: 557
- Joined: March 14th, 2008, 6:08 am
- Handle: Rabbit Ears
- Real Name: Cliff
- Call Sign: WW153
- Antenna: Hygain Penetrator 500
- Radio: RCI 2995DX CF
- Contact:
Re: D104 TUG8 Class A Preamp Mod
Just PM me for further details on the mod.
No prob!
No prob!
USA FOREVER
RCI 2995DX CF (PRIMARY BASE)
President HR2600 with Palomar TX-150 amp(backup base) *solar powered*
Turner Super Side Kick
RM Italy KL300P (A/B modded) in truck
BIRD 43P
HY-GAIN SPT-500 antenna
RCI 2995DX CF (PRIMARY BASE)
President HR2600 with Palomar TX-150 amp(backup base) *solar powered*
Turner Super Side Kick
RM Italy KL300P (A/B modded) in truck
BIRD 43P
HY-GAIN SPT-500 antenna
-
Trapper267

- Donor
- Posts: 337
- Joined: November 1st, 2012, 9:56 am
- Handle: Trapper 267
- Real Name: Scott Smith
- Antenna: Imax 2000
- Radio: RCI-2995DX
- Contact:
Re: D104 TUG8 Class A Preamp Mod
Hey Mr. Rabbit
Have you installed the electret mic element into a G-Base (Non amplified) stand yet?
I have 3 G-bases i wanna put that element into.
I'v already modified the Silver and Gold models i have and all the D-104 head's are working with the electret element's on the amplified stand's. Just gotta figure out the G-Stand's i have.
C-ya Trapp
My Skype name is ( slingslingbinks )
-
Rabbit Ears
- Donor
- Posts: 557
- Joined: March 14th, 2008, 6:08 am
- Handle: Rabbit Ears
- Real Name: Cliff
- Call Sign: WW153
- Antenna: Hygain Penetrator 500
- Radio: RCI 2995DX CF
- Contact:
Re: D104 TUG8 Class A Preamp Mod
Sorry chum, I have not done this for the non-amplified bases.
USA FOREVER
RCI 2995DX CF (PRIMARY BASE)
President HR2600 with Palomar TX-150 amp(backup base) *solar powered*
Turner Super Side Kick
RM Italy KL300P (A/B modded) in truck
BIRD 43P
HY-GAIN SPT-500 antenna
RCI 2995DX CF (PRIMARY BASE)
President HR2600 with Palomar TX-150 amp(backup base) *solar powered*
Turner Super Side Kick
RM Italy KL300P (A/B modded) in truck
BIRD 43P
HY-GAIN SPT-500 antenna
-
Trapper267
- Donor
- Posts: 337
- Joined: November 1st, 2012, 9:56 am
- Handle: Trapper 267
- Real Name: Scott Smith
- Antenna: Imax 2000
- Radio: RCI-2995DX
- Contact:
Re: D104 TUG8 Class A Preamp Mod
Chum????
Thought we were friend's. lol
Thank's Mr. Rabbit
Thought we were friend's. lol
Thank's Mr. Rabbit
My Skype name is ( slingslingbinks )
-
Blue Ox2

- Donor
- Posts: 713
- Joined: March 27th, 2017, 5:17 pm
- Handle: Blue Ox
- Real Name: Mike
- Call Sign: KC3LAV
- Antenna: DR-Dipole, Copper "J"-Pole, IMax 2000, MFJ 1740, and a "Slinky" 40M dipole
- Radio: President McKinley&Washington+142GTL Direct Injected by Leadfoot Labs
- Contact:
Re: D104 TUG8 Class A Preamp Mod
halfwatt959 wrote: ↑October 24th, 2015, 6:06 am Thanks for the cool info. Cant wait to try this on one of my d104s. Wont do it on my silver eagle but I have 3 more normal tug-8s to try it on. Thanks again. 73s
Hi Halfwatt,
I would like to know if you have a few sets of the chrome cap screw sets from D-104 Mic heads?
Lookin' to get 4 to 6 sets if possible.
Thanks for your reply.
73,

**************
How do you do from Blue Ox2
KPA223 on the Galaxy DX 2517
American Eagle SSB Group * AE1582
The World Radio Club * 2WR1582
Lititz, PA (2013 "Coolest Small Town in America")
**************